 |
| V7997 |
 |
| V7997 - The front |
 |
| The side ( I really need a less bulky belt...) |
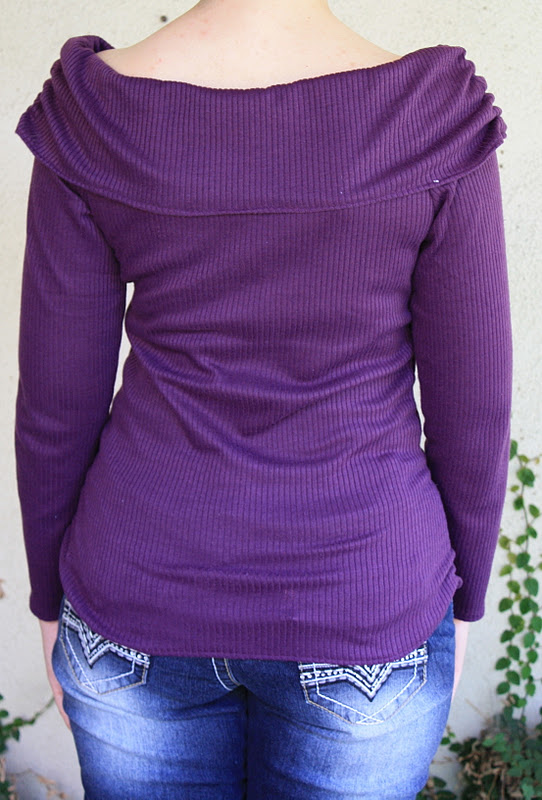 |
| The back |
Pattern Description: Off the shoulder pull over top with three sleeve length options, and elastic at the sides. I made view C - the full length sleeve option.
Pattern Sizing: (8-10-12-14) and (14-16-18-20). This was one of the first patterns I bought, and so I have the envelope with the larger sizes. I have since gone down in size, so I traced a 14 and graded down the neckline area to what I assume would be similar to a size 12.
Were the instructions easy to follow? Yes the instructions were easy, although they seem to be written for a straight stitch only machine? I used the tiny zig-zag stretch stitch on my sewing machine to sew the seams where there would be elastic casing, and the fake stretch overlock stitch on my machine to sew the sleeve seams. I did mostly follow Vogue's directions for finishing, although in the future I may try alternative finishing techniques for the hems. Also, I will caution that easy is not the same as fast. Since so many of the seams are actually casings for elastic, there is a lot more time spent fiddling with them than might be obvious at first. I used the safety pin method to get the elastic in the casings, which worked great, but still requires more time than just stitching together a few seams.
Did it look like the photo/drawing when you were done with it? I think so, for the most part. Because I lengthened the patten I don't think the sides were quite as gathered (I think I used too much elastic). Also, since my fabric was more of a sweater weight knit rather than a lightweight top knit I don't think it looks quite as form fitting as in the drawings, but overall I still like it.
What did you particularly like or dislike about the pattern? I do like the style - I think it is sort of elegant enough to dress up, but still casual enough to wear out on errands since it is just a top. I could see lengthening this to a dress that could look really classy and elegant if done in the right type of fabric. Also, I think the instructions are super easy, although I think for some steps there are other techniques that are more useful, or quicker with better results (such as the seams for the sleeves - I am sure people with sergers or coverstitch machines will know when to best utilize them on this top). I do like that there is an extra piece of elastic around the shoulders that is used to keep the top in place, although I will say that this style is not the most practical if you are going to be doing anything active that involves bending over or carrying things (so, not a great travel top - wear it out to dinner after you get to your destination). One minor complaint is that when I tried it on the arms seemed really long, but after I hemmend them according to instructions there were a little bit short. I should have just done a narrow hem and they would have been perfect. No major dislike though, overall I think it is great.
Fabric used: Mystery ribbed knit from the $2.49 flatfold section. It is super soft though, and I am thinking it is some sort of cotton/poly blend? Or rayon/poly? Not really sure, but it is soft and warn so I like it.
Pattern alterations or design changes you made: Well, the only real alteration I made was to add +2" of length to the body of the top. Since I was adding so much length, I calculated that to keep the same length:elastic ratio I should use 10 7/8" elastic on the sides. However, this didn't have quite the gathered effect I was hoping for (as shown on the cover) and I feel it just looks a little wrinkly instead of intentional. So next time I will use less elastic (but still a bit more than the regular pattern). As for other alterations, what I originally wanted to do was use the cross grain on the collar pieces, so that my stripes would be running vertical on the body and horizontal on the shoulders (this pattern does a great job of hiding it anyway, but I actually do have somewhat narrow shoulders compared to my hips, so I really wanted to milk this pattern for all it is worth). However, after cutting out my fabric and trying on that collar piece I realized that there is zero stretch in that direction and there would be no mobility for my arms if I went with my original design idea. Luckily I had enough fabric, so I recut the collar on the proper grain so it would have enough stretch for practicality sake. I am sad my idea didn't work out, but I do like the finished top anyway, so I guess it is ok. Moral of the story: horizontal stretch is critical for this pattern to work.
Would you sew it again? Would you recommend it to others? Yes to both! I don't think I need a wardrobe full of these tops (it is quite distinctive), but I think this could be quite elegant in a deep red or a great black material. Also, I really like the idea of turning this pattern into a dress because I think the top portion is so elegant. It could also be cute to do the collar in a contrasting fabric, or use some other cute design ideas. I think the shape is quite flattering, especially if you have narrow shoulders or a pear shape, and it is quite easy to sew, so I would highly recommend this pattern to others.
Conclusion: Great pattern! Easy to sew and nice results. This pattern could look good on a lot of people, and if you get creative, there are lots of ways I think this pattern could be used to make something special.
So yay, another project down! The super exciting sewing purchase has been shipped (woo!) but not here yet (boo), so I guess next week I will be working on my snake print trench coat. Since I feel pretty confident with my Burda fitting by now, and I am not using super special or expensive fabric, and since this isn't a super fitted garment I am thinking about not making a muslin for once (*gasp*). I don't think I will cut straight into my fashion fabric, but I think I might want to use muslin as an underlining, so I will probably cut that and pin fit with the muslin. If it looks ok I will use it for the underlining, and if not I will figure out where to go from there. Much as I like these fun small projects, I spend so much time dreaming about the big, long, complicated ones that I seem to spend more time working on them. I think that is one of the great things about sewing - you can dream something up then make it a reality. And right now I am dreaming about a snake print trench coat.
I look forward to following your tench progress. One thing I like to do is sew the lining first if I am skipping the muslin . That way it saves my fashion fabric if there is a fitting disaster, but I haven't wasted any time if all is OK.
ReplyDeleteI am making this top at the moment and am not sure how the elastic down the sides works! I've used the amount the pattern says but it isn't gathered at all. As it's the first pattern I've ever tried I'm very unsure of myself!
ReplyDeleteDo I cut the elastic shorter?
P.S. Yours looks lovely. :)
ReplyDelete@Anonymous:
ReplyDeleteTo deal with the elastic I would suggest making it shorter if it isn't looking too gathered. Just be careful not to make it too short otherwise your top will be too small lengthwise! To do this I would suggest sewing the elastic casing (sounds like you already did this step), insert the elastic (sounds like you got that far too), and stitch down the bottom end of the elastic and the casing (as described in the instructions). Then you can pull the top part of the elastic until you get the desired amount of gathers, stitch it down, cut off the extra and continue on with the shirt.
Another thought: Since I am always adding length to my tops I would worry about too short of an elastic making the top too short. What I might try instead is making the casing shorter (just cut it open where you want the new ends to be, careful not to cut through the side seams) and using much less elastic. You can fiddle with the amount of elastic like I described above. You could place the elastic closer to the hem or closer to the middle of the top, and use a small amount of elastic to get a really gathered look at either the bottom or the middle section without worrying about the top getting too short.
I am not sure exactly how much gathering there is supposed to be, but I think there should be a little bit more of an effect than what I got. I think for my top it just looks wrinkly and not as intentional as I would have liked. In the future I will probably try the shorter casing method to get some more pronounced gathers in a more localized area, rather than softer gathers along the entire side seam.
Anyway, hope that was helpful - feel free to leave more questions if you need more advice!
Thank you so much, that's really, really helpful!
ReplyDeleteI too love skating, but mine's ice skating. I used to roller skate a lot when I was a teenager and my Mum has my rollerboots now. :)
Kate
I've done the sides again and it looks great. Thank you again for your assistance.
ReplyDeleteGreat! I am happy it worked out for you!
ReplyDelete